


Pocket Tracker Insider – Issue #4
Behind the scenes: new firmware, 9-axis IMU close-up, and source code for the falling pixels effect

Hi! I’m Gabriele, a freelance embedded developer from Italy and this is the 4th issue of the Pocket Tracker Insider newsletter.
If you missed the previous issues, you can check them out HERE.
I’m back with some updates about a new firmware upgrade, a closer look at the IMU I’m using on the Pocket Tracker and the code for the falling pixel effect.
Thanks for being here. Let’s get into it!
Today’s Topics:
🔄 Firmware upgrade — what’s new and what changed
🧭 Inside the IMU — why I chose it and what it can do
🎮 Dev Zone: Falling Pixels Effect — diving in the source code
1. Firmware upgrade
The Pocket Tracker is a device I actually use a lot myself. It started as a personal project, and once I felt it was solid enough, I made it available for you too: [LINK]
Over the past year and a half, I’ve been continuously improving it to better suit my needs, and hopefully yours as well. I’ve added a lot of new functionality:
from simply showing GPS coordinates to recording full GPX tracks, performing advanced math and statistics, interfacing with specialized sensors for custom projects, featuring a proper user interface with icons, and managing power efficiently.
One thing I’ve been wanting to do for a while was to add a main screen with aggregate statistics — a place where you can see all the key information at a glance. That’s the biggest highlight in this new firmware upgrade.
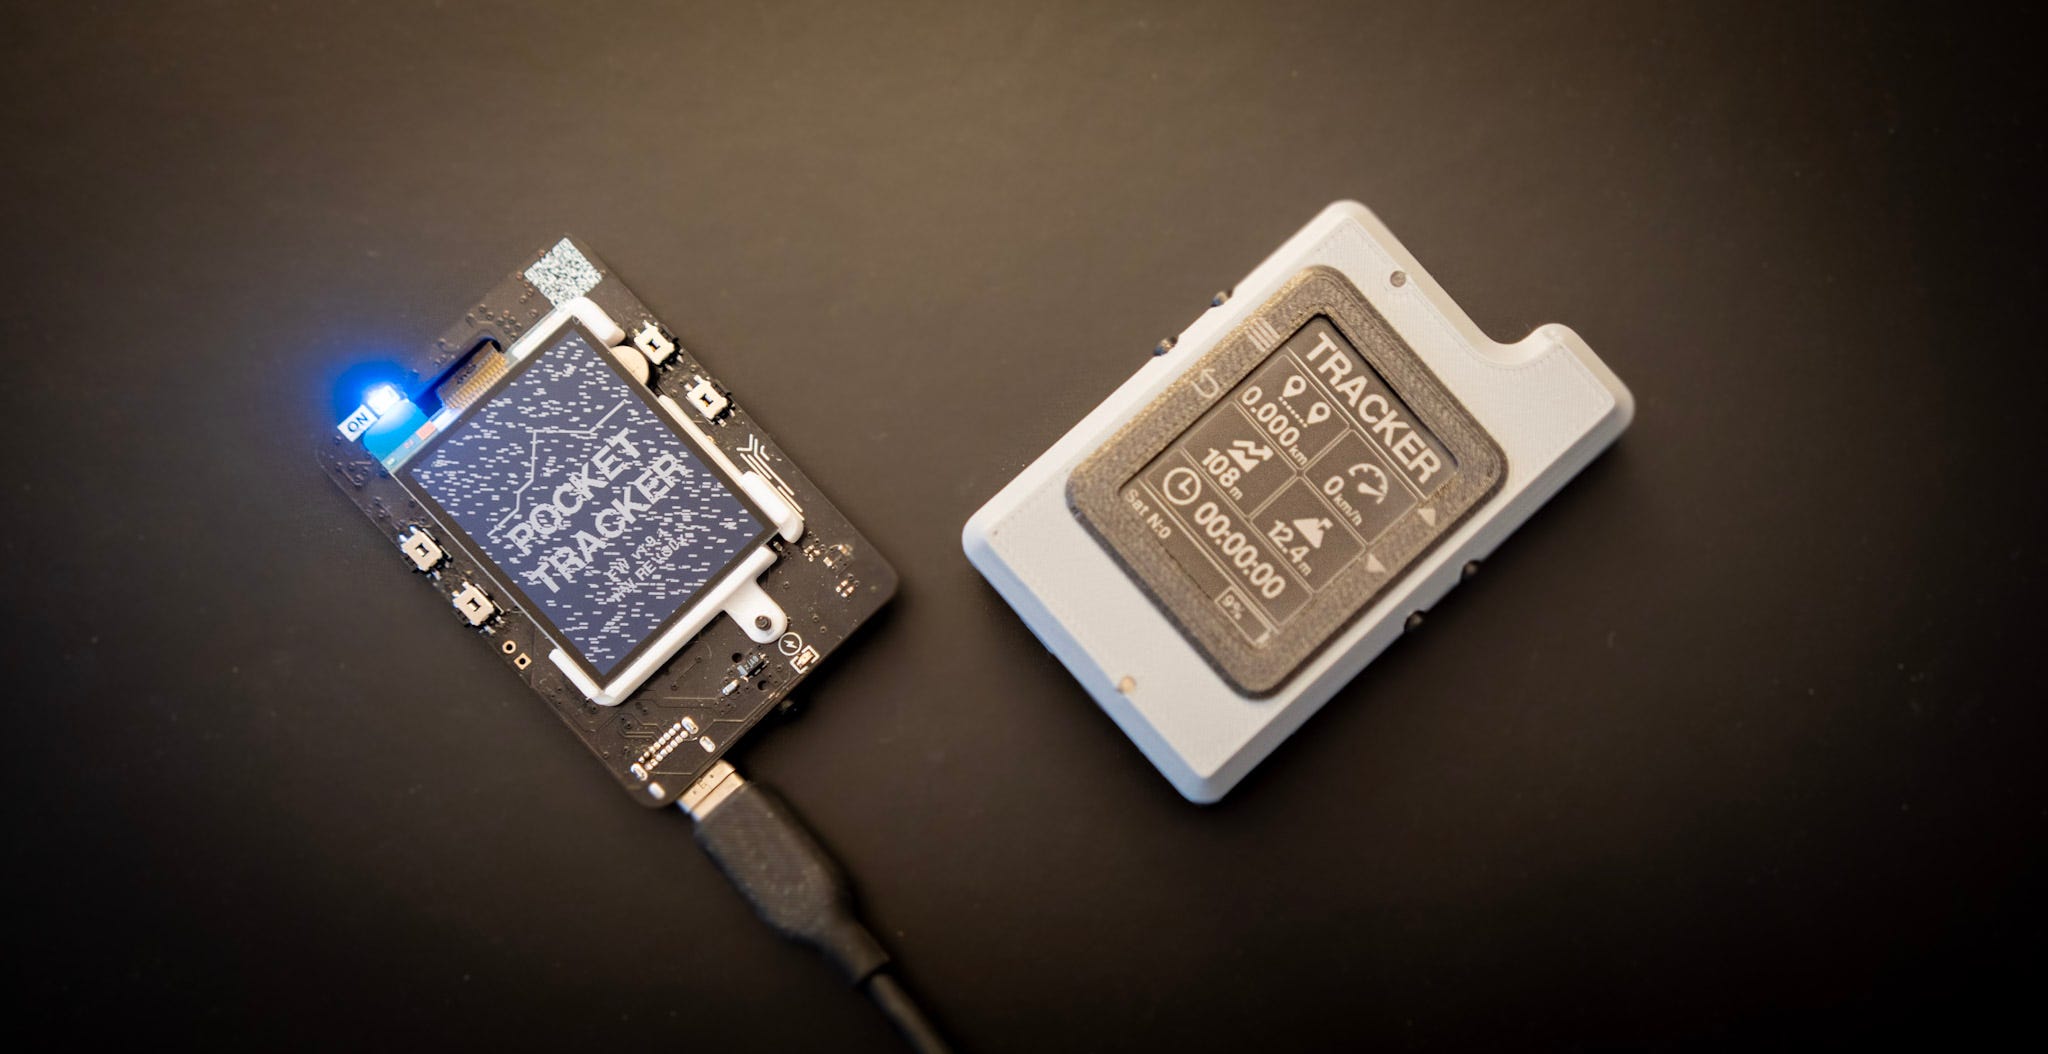
I also tweaked the Settings menu a bit to make it more readable, and added the falling pixels effect at startup — just because it looks cool. When I posted it on Instagram, many of you really liked it, so… it’s in!
I just uploaded Firmware Release 1.9.4. If you already have a Pocket Tracker, updating is super easy:
just download the binary file from my website, copy it to the SD card, reboot the device — and you're good to go!
This is a personal project I’m investing a lot of time and effort into because I genuinely enjoy it. It started as a hobby, and while I love sharing the process and what I’m learning along the way, it does take quite a bit of time.
If you want to support the project, consider ordering a Pocket Tracker and becoming part of the journey — or just say thanks. That means a lot to me too!
2. Inside the IMU
With the latest firmware, I also fixed a few bugs and improved the compass functionality.
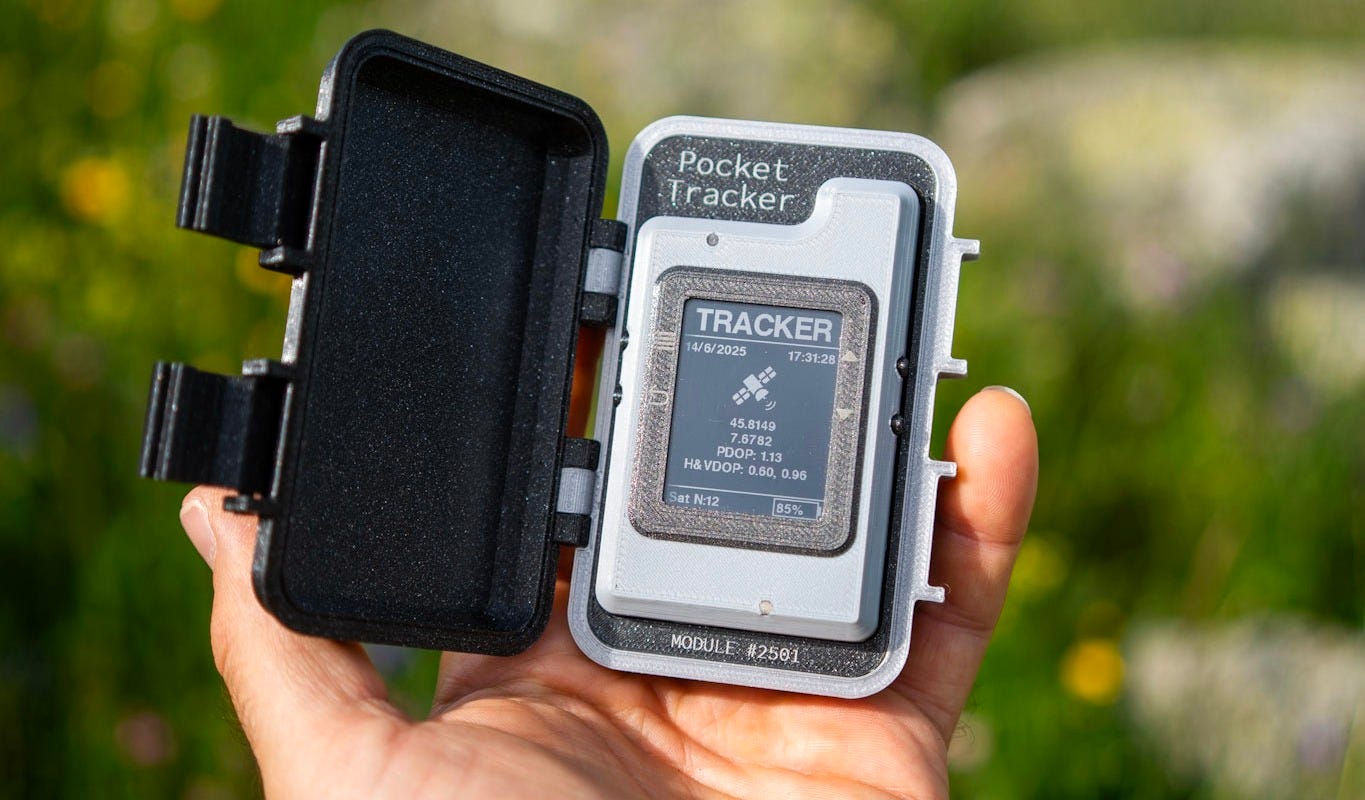
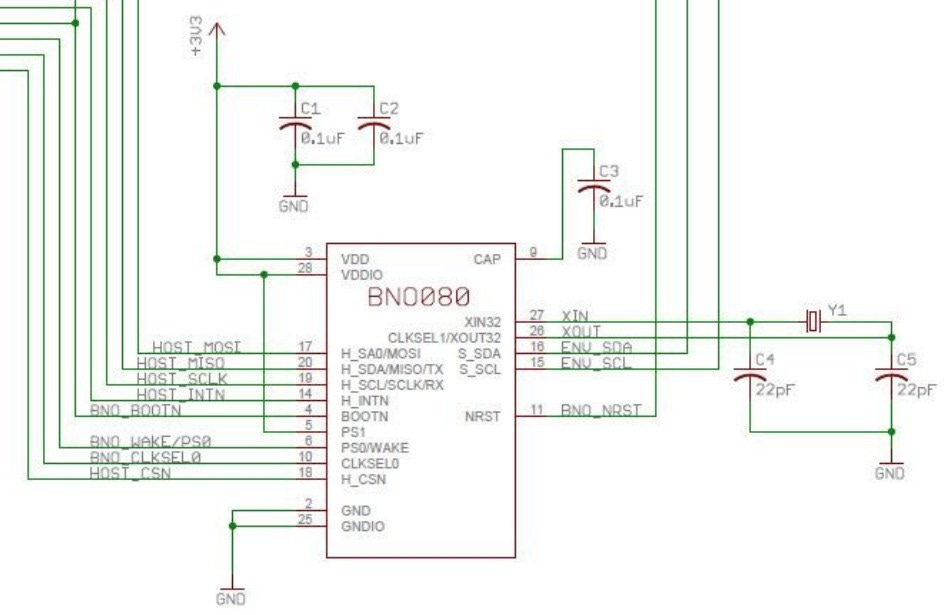
The Pocket Tracker has a built-in 9-axis IMU, the BNO086. Interfacing with this sensor wasn’t easy — it took some work to get everything configured correctly — but now it’s running smoothly and delivering solid data.
The IMU on the Pocket Tracker can be mounted on the PCB in any orientation, so it’s essential to define its physical orientation at startup. This way, the internal algorithm can compensate correctly, and when you open the compass, it always points to true north — no matter how the board is mounted.
One of the coolest features of the BNO086 is that it autocalibrates while running. When you open the compass, you just need to move the device around a bit — tilt it, rotate it in a figure-eight — and that’s it. Your Pocket Tracker is now calibrated.
This is actually one of the main reasons I chose this component. Magnetometer calibration can be really frustrating, especially for a DIY device like this that doesn’t come fully assembled. Calibration depends on the final mechanical setup: ferromagnetic screws, battery size, and other components can all influence the magnetic field.
In most products, calibration is done after final assembly at the factory — or requires a lot of processing power and complex algorithms in firmware. The BNO086 handles all of that internally, making it a perfect match for a modular device like the Pocket Tracker.
💡 Hint: If you're interested in this topic, Read this!
Now you can see why having an IMU with built-in processing and calibration is such a big deal for the Pocket Tracker. You can assemble the device with the parts you want — and it will still calibrate itself.
At the moment, the IMU is used in two main ways on the Pocket Tracker:
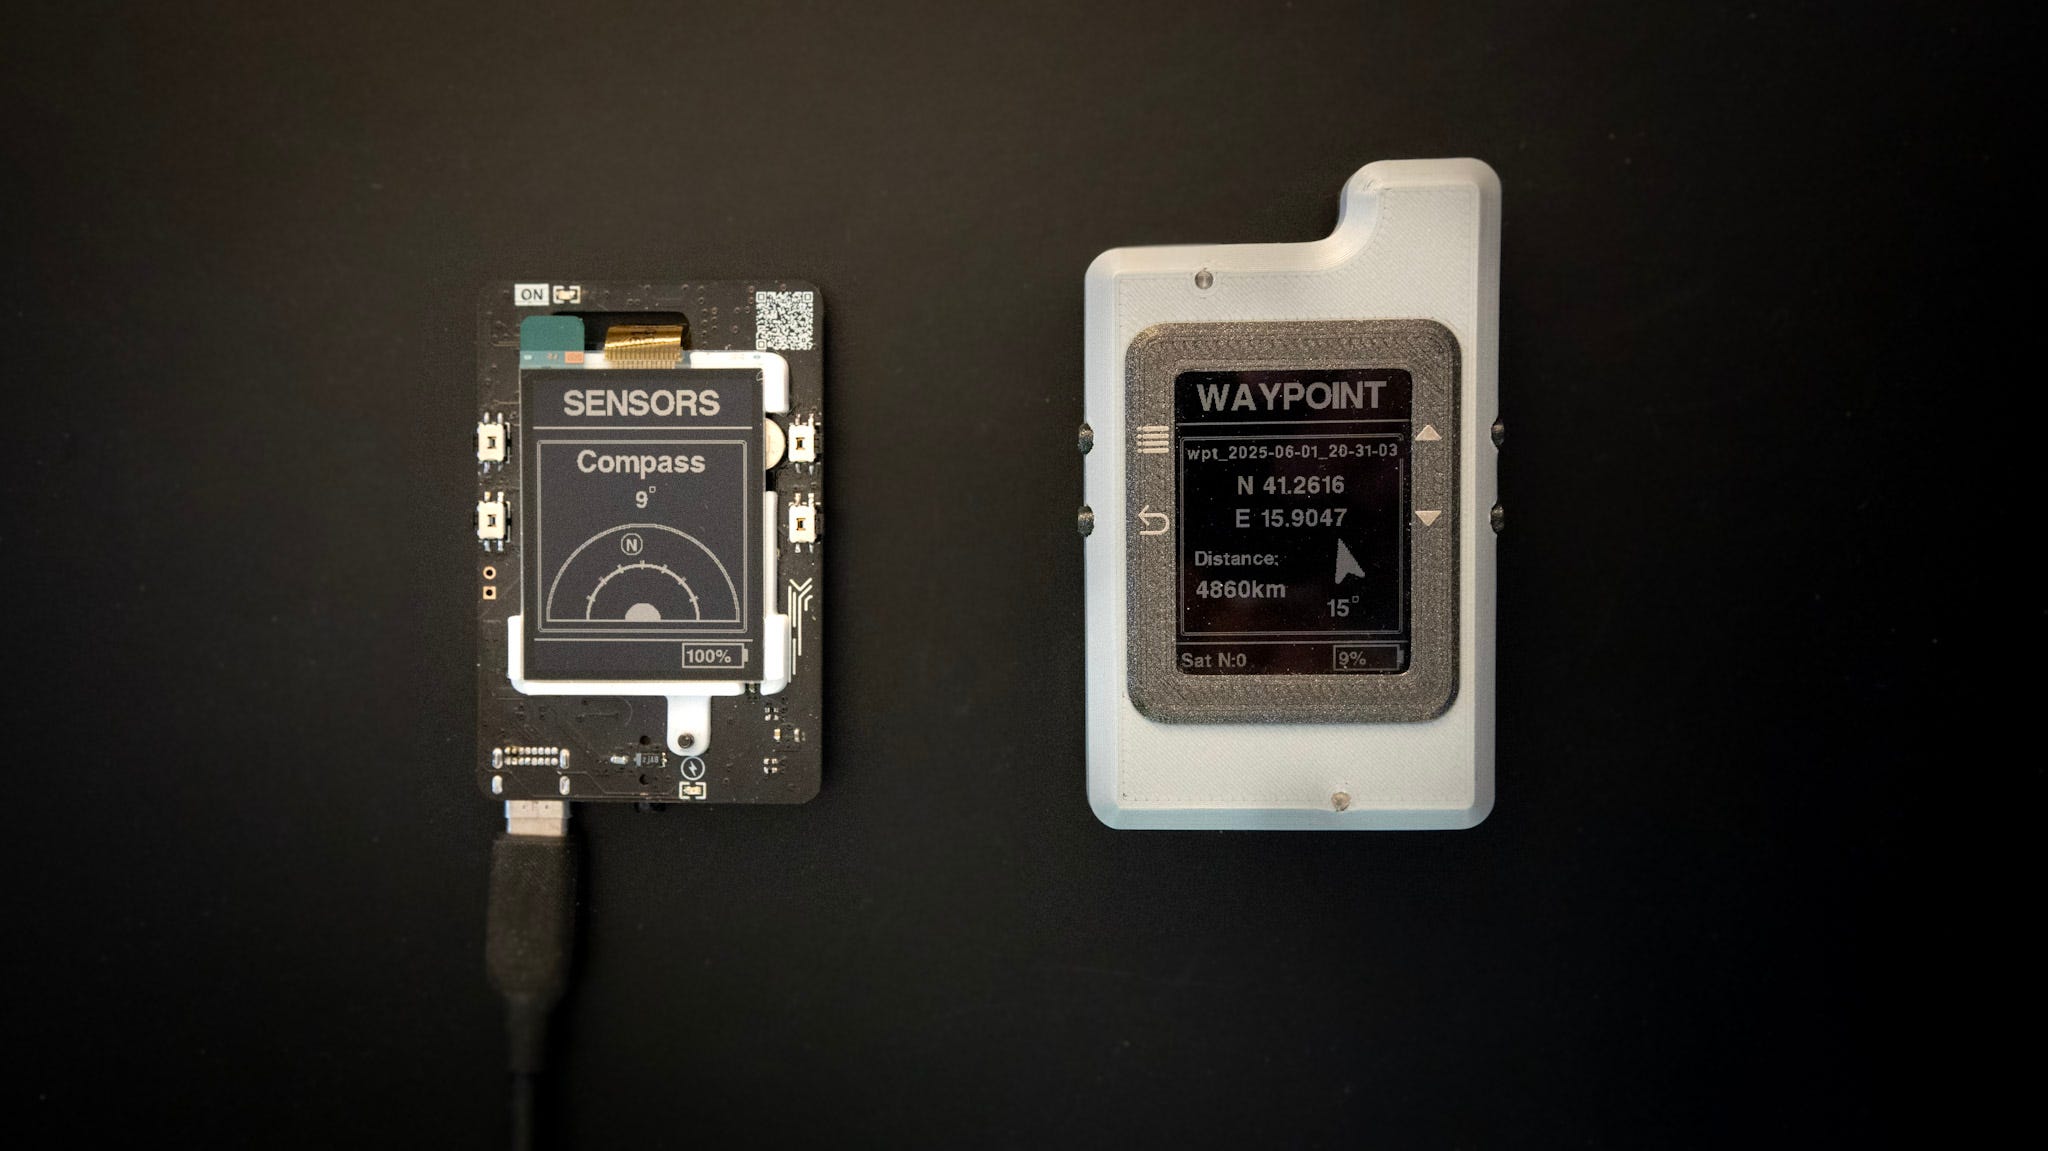
🧭 Compass — accessible from the Sensor menu
📍 Waypoint navigation — when you open saved waypoints
The waypoint feature is one of my favorites: you can save points of interest on the SD card as standard GPX files, and open them anytime. The Pocket Tracker will then show you how far you are from that waypoint, and more importantly, which direction to go to reach it.
I think that’s pretty cool.
The BNO086 can actually do much more, it even has built-in step counting. So who knows… maybe that’s what I’ll implement next. 😉
3. Dev Zone: Falling Pixels Effect
I know many of you are into hardware and firmware, so I thought it would be fun to occasionally dive into specific parts of the Pocket Tracker code and break them down here.
For this issue, I picked the Falling Pixels effect I recently added to the Pocket Tracker’s startup sequence.
This startup animation is a simple but satisfying "screensaver" effect where pixels appear to fall across the screen, gradually covering it. It's entirely written in C, using ESP-IDF and FreeRTOS.
🧠 The Idea
The concept is to simulate falling particles that move in a configurable direction (like falling rain or snow). Each pixel's position is updated over time, giving the impression of motion. By controlling whether previous positions are erased or not, we can choose between:
A clean, moving pixel effect, or
A trailing effect, where pixels gradually fill the screen — perfect for a startup sequence.
🧱 Data Structure: Pixel
Each particle is represented by a simple Pixel struct:
#define LCD_WIDTH   230
#define LCD_HEIGHT  303
#define NUM_PIXELS  600
#define SPEED       1.4
#define PARTICLE_SIZE 2

#define PARTICLE_TRAILS 1  // Set to 0 to disable trails (i.e., erase old pixels)
typedef struct {
    float x, y;
    float prev_x, prev_y;
} Pixel;

// Global state
volatile float g_screensaver_angle = 45.0f;  // Can be changed from another task
volatile bool screensaver_should_exit = false;

static Pixel particles[NUM_PIXELS];
x, ystore the current position.prev_x, prev_ystore the last position, which is useful if you want to erase the previous pixel and avoid trails.
You have an array of NUM_PIXELS (600) particles initialized at random screen positions.
⚙️ Initialization
The init_particles() function sets up all particles with random x and y coordinates within the display boundaries (LCD_WIDTH and LCD_HEIGHT). Both current and previous positions are initialized to the same value.
// Initialize all particles with random positions
static void init_particles() {
    for (int i = 0; i < NUM_PIXELS; i++) {
        float x = rand() % LCD_WIDTH;
        float y = rand() % LCD_HEIGHT;
        particles[i].x = x;
        particles[i].y = y;
        particles[i].prev_x = x;
        particles[i].prev_y = y;
    }
}
🎨 Drawing & Erasing
Particles are drawn as small 2×2 squares (PARTICLE_SIZE = 2), giving them more visual weight than a single pixel.
draw_particles()fills a black square at the particle’s current position.erase_particles()(if enabled) redraws over the previous position with a white square.
Right now, you’ve commented out the erasing part to create trails — a creative choice that lets the screen get progressively "painted" black before the main application starts. It gives a nice fading-in effect.
// Draw all current particle positions
static void draw_particles() {
    for (int i = 0; i < NUM_PIXELS; i++) {
        int x0 = (int)(particles[i].x);
        int y0 = (int)(particles[i].y);

        for (int dx = 0; dx < PARTICLE_SIZE; dx++) {
            for (int dy = 0; dy < PARTICLE_SIZE; dy++) {
                int x = x0 + dx;
                int y = y0 + dy;
                if (x < LCD_WIDTH && y < LCD_HEIGHT)
                    lcd_DrawPixel(x, y, Black);
            }
        }
    }
}

// Erase previous particle positions (only if trails are disabled)
static void erase_particles() {
#if PARTICLE_TRAILS == 0
    for (int i = 0; i < NUM_PIXELS; i++) {
        int x0 = (int)(particles[i].prev_x);
        int y0 = (int)(particles[i].prev_y);

        for (int dx = 0; dx < PARTICLE_SIZE; dx++) {
            for (int dy = 0; dy < PARTICLE_SIZE; dy++) {
                int x = x0 + dx;
                int y = y0 + dy;
                if (x < LCD_WIDTH && y < LCD_HEIGHT)
                    lcd_DrawPixel(x, y, White);
            }
        }
    }
#endif
}
You could easily turn this into a toggle with a #define PARTICLE_TRAILS 0
🎞️ Animation Loop
In the screensaver_task() function:
The movement direction is calculated using the
g_screensaver_angle(in degrees), converted to radians.A velocity vector
(dx, dy)is computed usingcosandsin, multiplied by a fixedSPEED.The loop runs every 10ms:
It erases particles from their previous position (optional, depending on whether you want trails).
It updates all particle positions with the computed
(dx, dy).It draws the particles in their new positions.
The framebuffer is refreshed with
lcd_refresh().
You also handle screen wrap-around, so particles that go off-screen come back in from the opposite side.
// Update positions of all particles
static void update_particles(float dx, float dy) {
    for (int i = 0; i < NUM_PIXELS; i++) {
        if (PARTICLE_TRAILS == 0) {
            particles[i].prev_x = particles[i].x;
            particles[i].prev_y = particles[i].y;
        }

        particles[i].x += dx;
        particles[i].y += dy;

        // Wrap-around edges
        if (particles[i].x < 0) particles[i].x += LCD_WIDTH;
        if (particles[i].x >= LCD_WIDTH) particles[i].x -= LCD_WIDTH;
        if (particles[i].y < 0) particles[i].y += LCD_HEIGHT;
        if (particles[i].y >= LCD_HEIGHT) particles[i].y -= LCD_HEIGHT;
    }
}

// Screensaver task
void screensaver_task(void *pvParameters) {
    init_particles();
    screensaver_should_exit = false;

    while (!screensaver_should_exit) {
        float angle_rad = g_screensaver_angle * M_PI / 180.0f;
        float dx = SPEED * cosf(angle_rad);
        float dy = SPEED * sinf(angle_rad);

        erase_particles();
        update_particles(dx, dy);
        draw_particles();

        lcd_refresh();
        vTaskDelay(pdMS_TO_TICKS(10));
    }

    vTaskDelete(NULL);
}
🧩 Add this to your main() or application startup code:
TaskHandle_t screensaver_h;

// Start the screensaver task
xTaskCreate(screensaver_task, "screensaver", 4096, NULL, 1, &screensaver_h);

// Let it run for 5 seconds
vTaskDelay(pdMS_TO_TICKS(5000));

// Signal the task to exit
screensaver_should_exit = true;
That’s it for this little visual detour! Simple in concept, lightweight in code, but a fun way to give your device some character right at startup. I like how it gradually takes over the screen.
Let me know if you’d like to see more behind-the-scenes code in future issues 😉
4. Thanks & See You in the Next Issue
That’s all for this issue — thanks again for reading all the way to the end!
I hope you found it interesting, and I’ll see you in the next one.
If you have questions, ideas, or just want to say hi, feel free to reply — I’d love to hear from you.